Saturday, April 16, 2011

My First Flower

Big news for me. Possibly mediocre news at best for you.
I finally tried making a certain type of flower embellishment and succeeded on my first attempt! Yay me! So proud of myself. What do you think? Perhaps a pretty something for a new purse?


Why have I waited so long to try out making these simple, melted petal beauties?
This one was made with a poly satin, scraps that I just couldn’t seem to throw away. (Great, like I need another reason to hold onto small pieces of fabric.)

And how did I do it, some may ask? Easy peasy. Here were some of my tools.


I traced two different size circles onto my scrap fabric. In this case these circles came from the top and bottom of the same kids’ cup. Then I very informally doubled/tripled over the fabric and cut out the less than perfect shapes.
Here’s the tricky part. It involves fire! Holding the edge of the fabric circle close to the flame of a small candle (tea candle in this instance) I watched for the fabric to begin melting, curling, and/or changing shape. If you hold the fabric too close, it will catch on fire – FYI. You only need the heat, not the flame. I did cut some burnt edges off and then re-melt those areas, but some edges I kept “crispy” on this off-white color because I liked it.

Once you have a bunch of circles properly melted, a process that prevents fraying as well, stack the “petals” starting with the largest, flattest one as your base. Arrange with the smallest circle on top. To hold these petals together you can choose to glue them or put a simple stitch or two through the center of the stack. I went with the thread and needle method. Super easy.
Centers of the flowers can be anything. You could continue to cut smaller fabric pieces and crinkle to your heart’s delight. Perhaps you want to sew in some beads or sequins. For me, a vintage earring with the back removed (reason for the pliers) worked great… glued in with that heavy duty glue stuff.

There are lots of sites and blogs with more detailed directions, options, and ideas if you’re looking for more info. Feel free to check out any or all of these:


Off to make some more beauties!

~Carey

Friday, April 15, 2011

I Don’t Need No Stinkin’ Pattern!

That’s it. Start the day off with a lie. Great policy.  Well, this isn’t the true beginning of my day so perhaps I’m safe? No, a lie is a sin regardless of the time it was told. I must confess… I do sometimes use patterns.

Sewing or crafting patterns are incredibly useful tools. Contrary to the belief of certain individuals (like my Mom who tries to sew) patterns are must-haves for beginners. They teach you so much! I like to have basic shapes on hand for whatever project I’m working on, whether just to refer to if I’m stumped or as a refresher course if I haven’t sewn a particular item in a while. With complex items, for me that means super tailored clothing, I always use patterns.  (Disclaimer – most of the time I do end up making stuff up as I go along, for better or worse.)

Wednesday’s shopping excursion to my favorite fabric mills included a great score on some basic patterns for only $1.99 each. (We’re talking orig prices of over $10. Jealous?) I’ve mentioned previously that prep work is ESSENTIAL for sewing productively. Or, in my case, essential to being a creative sewer. When everything’s ready to go I am free to just create. Roadblocks stink.
This morning, after my usual routines of taking care of the dog, making coffee, checking email, etc, I decided to open my new stash of patterns get them ready for eventual projects. Of course that means turning my dining room, er, my SEWING room into something resembling this:


Is this normal? Or am I alone?

If you were a fly on my wall you may have heard phrases muttered such as, “Now why is the piece to the blouse on the page with the pants?”, “Where is 13C? I found 13A. And why is there no mention of 13B anywhere? Why skip B?”, “Did I lose that tiny facing piece already?”, and the inevitable “How the He!! do I fold all of these up?”

Seriously, unfolding those pieces of tissue are hard enough. Then you’re expected to cut them apart without tearing or cutting through anything. Um, yeah… realistic. Today I did manage to dismantle and reassemble 5 pattern sets in about 30 min without destroying anything. Yes, I’m impressed too.
After scratching my head a few times and trying to refold the various bits and pieces, this is how I like to store my tissue patterns… because we all know they’re never going t fold up nicely and fit inside that envelope… which probably got ripped anyway…


Resealable plastic bags are the BEST! Love!
(And why does “resealable” come up as misspelled in spell check? How am I supposed to spell it?)

For .pdf pattern files downloaded from various sources I usually print and assemble the paper versions as templates, keeping them all in a manila file folder. Then (the redundant step) I trace tissue copies of each piece, cut those out, and store them in the same manila folder. Why? First, it’s easier to pin tissue than regular printer paper. Second, I like to be able to see fabric through the pattern pieces. You know, for lining up decorative stuff. Third, I’m just crazy like that.

How do you store your patterns?
Are you crazy like me dismantling ahead of time, or do you cut as needed?
Any tips or tricks for keeping tissue patterns for multiple uses, especially when working with different sizes of clothing?
I’d love to hear your crazy (or boring, sane) thoughts!

~ Carey

PS – Regarding free patterns you can find and download online, I know it’s very tempting to just use someone else’s pattern for resale purposes even if they have a posted disclaimer advising otherwise. Please remember that someone else used their time and energy to create these helpful tools for you. These same people then offered their knowledge to you for FREE! In most cases you can buy patterns with a license to sell on a small scale for under $10, or you can contact the designer directly to work out an individual plan. If you’re going to profit from someone else’s hard work, you can at least throw them a couple of bucks and mention their name, right? <stepping off my soapbox>


Thursday, April 7, 2011

Ah, the Sweet Smell of… Vinegar?

What? You don’t long for the pungent smell of vinegar… like the way you love to smell a freshly opened bag of coffee or a new bouquet of flowers? Yeah, me neither. But it is a wonderful, all purpose cleaner. I wonder if any other basic household ingredient is as versatile. And once the smell of white vinegar is gone, it’s gone, along with any other odors that may have been clinging on for dear life. Unfortunately, this week I realized that my cupboards lacked this basic ingredient of life. Of course you only realize these things when you REALLY need them.

Because my teenage (18) son believes he has sole custody of our sole vehicle, I rested the burden of picking up more vinegar upon his shoulders. An easy task for most, a wretched, vile, obscene request for James. My son, aka “man-child”, loathes the smell of vinegar. As a small child I actually worried that he would get sick on a few occasions because it turns his stomach so fiercely. As he’s gotten older I only worry that I’ll have to hear his ongoing rant about how much he hates it… which usually includes lines like, “How can you use that’s stuff?!?”, “That’s disgusting!!”, and “I’m gonna throw it out the window” So, I knew I was pushing my luck a little when asking him to purchase one of those large jugs of his favorite item. If the store he selected didn’t have a big, gallon jug of it his instructions were to buy at least two large bottles. Here’s what he came home with:
shaky picture of a mere 32oz bottle
So, why would a mother torture her son in this way? Like I told you, I needed it.

On Tuesday night I went to a great little auction hoping to score some vintage linens my local auction house had listed. Of course I wasn’t the only person there interested in the linens. I was too cautious in the beginning and lost a couple of items. However, by the end of the night I came home with most of the goodies I had hoped for plus a few gems I never expected to see. Getting caught up in the bidding action, especially when you have a determined competitor, can get both exciting and addictive… and cause you to occasionally go over your budget. Just saying.


Most of the linens fell into the tabletop variety: tablecloths, runners, placemats, napkins. Also mixed into a few of the lots were crocheted doilies, collars, and mixed lace pieces. Then there was the lot of random fabrics, some “new”, others cut off of whatever their original designation was.

The extra gems I ended up with were vintage strands of high quality rhinestones in some amazingly rare colors still on their large cardboard spools. This is where I went over my intended budget… but I wanted them so badly!


Even if I don’t use them all (and I honestly can’t see me using ALL of them), hello resale!


Items I’ve obtained from past auctions include:


A great source of information on treasure hunting, whether via thrift store, yard sale, or auction house is Ginger Moon Traders. GMT is a vintage reseller whose main presence is on EBay, but they also have items posted to Etsy and Amazon. Their blog, Ginger Moon Treasures, is chock filled with tips and tricks and know-how. THIS is an excellent blog entry for first time auction-goers. (Click on the word “THIS”.)

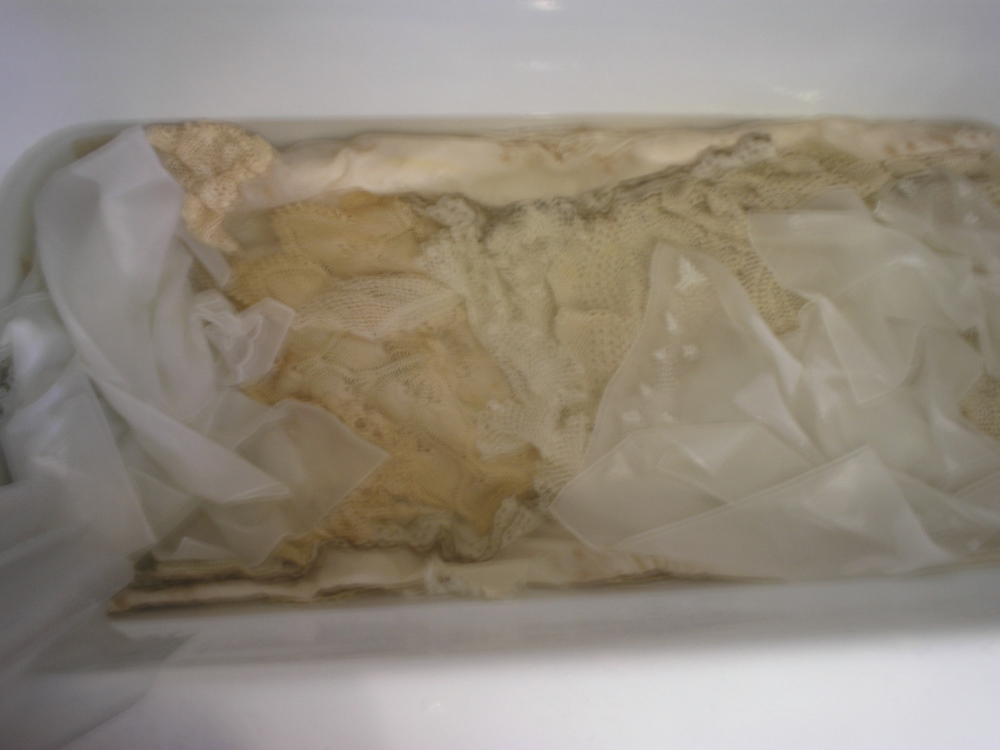
Now, bringing home stuff from an auction is not exactly a tidy operation. Think thrift store before it’s all sorted. DIRTY! And some of the smells… ugh. Throw into that the fact that I purchased fabric items and it’s a germaphobe’s worst nightmare. First order of business, de funk-ify-ing the lot. The best solution, a regular ol’ white vinegar and water bath. In this case it was literally a bath. I had so much stuff to de-stink and stains to soften that the tub was the biggest and most appropriate vessel to hold them in.

In went a half of the SINGLE bottle of vinegar brought home by the man-child, starting running the water, then added all of the linens. (Thank God they were so discolored. It distracts the eye from seeing the less-than-white tub.)


If you have a smaller batch of items to deal with, and a part of your home you don’t mind filling with the scent of vinegar, I’d suggest soaking your linens in a vinegar/water solution in a plastic basin/tub overnight. Just be careful when you open the door to that room the next day… or plug your nose with something… maybe wear goggles if you’re really sensitive… or torture your own man-child by having him deal with it!

After their bath all items were relocated to my washing machine (which is something else I could have, should have, used to bathe my beauties in, on a soak cycle.) I went through each item spot treating any ugly marks. Amazingly, spots that weren’t present earlier suddenly showed up. In some cases it could have been a reaction to the vinegar, but most of the uglies were revealed because the surrounding dirt and grime had been softened and rinsed away. Unfortunately, a few of the more delicate, crocheted edges on a few items did not survive the soaking process fully intact. Just getting the beauties wet was enough to unravel the last thread holding spots together. But do not fear - I still plan to re-purpose as much as possible, perhaps removing the damaged areas or including them in some purposefully tattered project.

The next step will be to use an enzyme detergent to finish cleaning the vintage messes. (I am so grateful for the hand wash cycle on my washing machine!) If spots remain, they’ll get another round of vinegar baths, spot treatments, then an enzyme detergent wash before I give up and hand them over to the world’s BEST spot remover, my Mom.

The hardest part of the whole auction experience for me is the re-purposing of my finds. I kinda feel like they’re my babies and don’t want to cut them up and use them, albeit for some beautiful end result. It’s still hard to let go. I have the same issue with some fabrics and trims I buy at regular stores too. They’re just too purrty to chop up! You’ll have to keep an eye on my Etsy store and FB page and harass me until I let go and create beauties that you’ll appreciate.

I’m hoping to head out to another auction at the end of the month. No idea what to expect, but that’s part of the fun.

Need help finding an auction in your area? Try AuctionZip.com. That’s where I found The Estate Market Place and all of these goodies. If that site doesn’t work for your area, then simply Google “auction” along with your area.
Happy Hunting!! 
~ Carey

Monday, April 4, 2011

Scraps are for the Birds!!

No, really. I’ve given my scraps to the birds. Fabric, thread, hair, fur, twine, cotton balls, yarn, string… all that stuff. It’s gone outside, out of my house, a cleaning process for me and potential building materials for our feathered friends.

In some parts of the world birds are already very busy building their spring nests. Here, in partially frozen New England where we just had an April Fools snow storm, birds are still figuring out where they’re going and how long they have to get there… which means I’m not too late!  Actually, birds continue to add to and rebuild their nests until their babies are grown sometime in the mid to late summer. This means it’s not too late for you either. Yay!


Next to my sewing machine in my sewing room (aka the dining room) hangs a plastic grocery bag filled with all sorts of odd and ends clipped right from my various projects. Although it contains mostly thread and fabric scraps, random pieces of plastic wrappers, staples, tape, broken chopsticks (I’ll explain that another day), and other assorted items are discarded there while I’m being oh so creative. This last grocery bag was stuffed and I really needed to throw it out in the trash. Alas, one pretty, almost spring morning, a bright cardinal sat in the dead-looking bush outside my bedroom window and inspired me to give back to nature. The birds were back and needed their own decorating supplies.

In years past I’ve simply left things outside on the porch or railings or chairs (or even in the lawn) for birds and other animals to come and collect. This year I wanted to invest a little more effort and hang stuff in trees. There are lots of ideas in cyberspace and written publications about what you can use to hold your birdie bits in, including, but not limited to:

Vegetable bags (think onions and/or oranges)
Wire suet cages
Grapevine balls or wreathes
Light bulb cages (hardware store)
Commercially made nest material holders
Open topped berry baskets
Mesh wrapped around a wire coat hanger


Some people are creative and thoughtful enough to design their own birdie stash holders.
Look at what Karen from SewManyWays created:

Or how about Amy from Amy Cornwell Designs artistic and functional sphere:

I opted for the middle ground and used items either destined for the trash or gathering dust for my fowl offerings. Reduce, reuse, recycle, right? Once my mind was in gear I immediately thought of a decorative, metal lantern once purchased on sale for some unknown use. It’s only use for the past decade has been to sit on top of my refrigerator gathering cobwebs. Lucky lantern, it now has a purpose!


This container was a bit too big and the holes actually a bit too small. Solution that will hopefully work, fill the inside with cardboard, toilet paper tubes. (No, I didn’t bother removing the scraps of tp. If the birds can get at them they’re welcome to those too.) Then I stuffed shreds of junk, er, I mean lovely scraps around the outside of the tp tubes pulling a few out here and there to let the birds know what they might find inside… should they bother to wander over.


My other nesting packages were made from red-orange, plastic netting originally fastened to the tops of clementine crates. For some reason these crates were still over in the recycling/trash area even though it had been months since I purchased said fruit. (An ongoing dialogue between myself and 18 year-old son. This time the lack of removal was to my, and our feathered friends, benefit, but we won’t tell James that… will we? Promise… or I’ll stop this blog right now. Thank you.)


Notice how my dog disliked being left out of the project. (He thinks he’s my second child, always wanting my attention when I’m not paying attention to him, but wanting nothing to do with me should I want to say… take his picture.)


I just folded the plastic nets in half, laced through some strands of a shredded burlap sack on 2 of the sides, filled with LOVELY ITEMS, and then closed it off with more burlap stuff.  Attach a ribbon to hang in the trees, and viola!


Now, all of this stuff… trash, clippings, up-cycled goodies… did require a little bit of consideration and prep work.  These are the items that are GOOD to put into your birdie stash:

Yarn            String         Fabric scraps         Thread          Wool
Batting             Pet fur           Horse hair          Human hair
Cotton Balls             Dead Leaves          Dead Twigs 
Dry Grass           Plant fluff           Feathers          Pine Needles  

Yes, you read correctly. Hair and fur are actually great items. They’re items collected naturally anyway. Please note that any bits of string or hair or fabric should be kept to less than 4” in length. In addition, fabric strips should not be more than 1” wide.  Why? Because long strings are likely to tangle around little birdie feet and necks and do serious damage. Not so pretty. Plus, what size birds are you hoping to cater to? The sparrows in my area aren’t likely to be seen carrying around a fat quarter sized scrap.

Items to AVOID including:

Dryer lint
Chemically treated hair or fur
Fishing line

Although dryer lint seems like an acceptable nesting supply, the chemicals we use in our wash are not kind to baby birds. Additionally, it doesn’t hold up to inclement weather.  Dryer lint stays wet, harbors bacteria and fungus, and makes the nest structurally weak. Bad for eggs and babies.

Now, armed with an overload of information and ideas, are you ready to go make your own happy homemaking kit for the returning beauties in your area?


~ Carey