Sew Simple: Fabric Envelope Tutorial
 Materials:
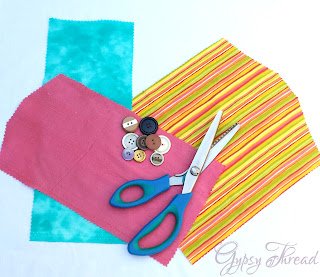
~ Fabric scraps of any kind, at least 8" long and 3" wide~ Buttons, 1/2" wide or larger are easiest to work with
~ Thread, in a coordinating or contrasting color
~ Pinking Shears (those zig-zag, alligator-teeth scissors)
~ Straight Pins
~ Hand Sewing Needle
Note: This tutorial can be completed without a sewing machine. The actual amount of stitching is minimal and would make an excellent project to practice your hand stitching. Alternatively, you could use a serger around the edges of the Fabric Envelope and skip trimming your fabric with pinking shears.
Fabric Prep:
 |
| Figure 1 - Fabric Measurements |
~ desired Pocket Width + 1" x three times the desired Height ~
For instance, if you'd like an Envelope pocket to measure 5" across inside and 4" tall when closed, your cut piece of fabric should be 6" x 16". (This is only a guideline for your first Envelope. Feel free to alter and play with the dimensions going forward.)
** The use of pinking shears will keep most fabrics from fraying. **
 |
| Figure 2 - Cut folded fabric diagonally. |
 |
| Figure 3 - Fold fabric in thirds. |
3) Open the fabric and lay it flat. Fold the fabric in thirds, with the short ends folding in toward each other. (Figure 3) Play with the layout of your folds until you've found an arrangement that you like for the appearance of your final Envelope.
 |
| Figure 4 - Pin pieces in place. |
The Sewing Part:
~ Remember, this section can be altered by skipping the use of a sewing machine and hand sewing the edges by hand.
1) Choose your thread and thread your sewing machine according to the machine's directions. If you're unfamiliar with your machine or do not have a manual, you can often find directions through a Google search entering your machine's brand and model number.
 |
| Figure 5 - Lining up fabric on the machine. |
 |
| Figure 6 - Finished Stitches |
Again, click on the photos for a larger view.
Attaching Your Button:
Choosing buttons and other trims are the trickiest part of part of this process for me. So many choices!
 |
| Figure 7 - Decide button placement. |
1) Decide where you'd like your button to rest once it attached and fastened to the Envelope. (Figure 7) Center it over the crease formed earlier on the flap. Do make sure to choose a spot at least a 1/2" above the pointed edge of your Envelope flap.
 |
| Figure 8 - Clip the button hole. |
 |
| Figure 9 - Make sure the button fits. |
3) Double check to make sure the button fits through the hole you just cut. (Figure 9) Cut the hole a bit larger if needed.
 |
| Figure 10 - Arrange the button. |
4) Find the spot where the button will be attached to the Envelope. Fold the flap closed, and arrange the button beneath the cut hole. (Figure 10)
 |
| Figure 11 - First thread pass. |
 |
| Figure 12 - Button threading. |
7) Continue stitching looping the needle and thread through both the fabric and button holes pulling the thread taut with each passing, taking care not to sew through the back of your Envelope or poking your fingers with the needle.
 |
| Figure 13 - Make a knot. |
And you're done!!!
If you have any extra tips for this project, or find a spot that should be tweaked a bit, please do feel free to comment and share with others. If you do make a Fabric Envelope from these instructions I'd love to see how it turns out. You can share your photos on the Gypsy Thread Facebook wall for all to enjoy.


What type fabric do you suggest using? I'd like to do this with some of the leftover nice cotton fabric from my curtain project, but I'm concerned about fraying.
ReplyDeleteYou can use just about any type of fabric for this project. Stretchy knits might be tricky, but if you were to use a serger instead of a sewing machine it might make things easier. Woven cotton fabrics (not stretchy) are perfect!
DeleteThe pinking shears are used so the fabric does not fray. They're great to use for finishing seam edges on just about any sewn item. It's a sewing short cut. I should probably amend the tutorial to say this. :-)
Ah, didn't realize that's what pinking shears did!
DeleteThis is such a cool tutorial and a great idea Ryan loved learning with you on Saturday thank you.
ReplyDelete